Google Assistant on ESP8266: A Step-by-Step Guide without IFTTT
Home automation is amazing as it brings comfort and convenience to your life by automating your home tasks. Using voice commands to control your home automation devices with Google Assistant makes the experience even better. However, most online guides suggest using IFTTT to control ESP8266 or NodeMCU boards with Google Assistant. This is not the most efficient way, and it can create extra delay in processing your requests. In this article, we will show you how to implement Google Assistant on ESP8266 without IFTTT quickly and easily.
What You Will Need
To get started, you will need the following items:
- A Google account with a Google Developer Console (free)
- An Android device with the Google Assistant application installed
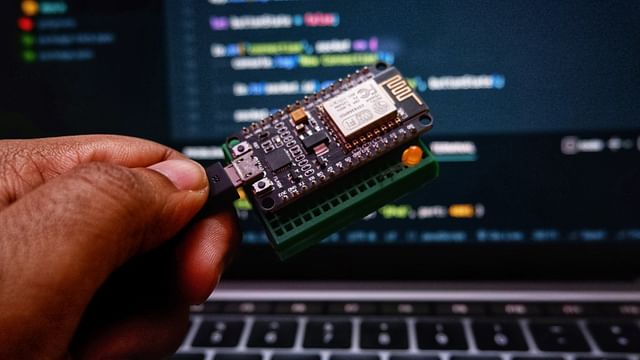
- An ESP8266/NodeMCU board
- A 5V power source
- A basic understanding of Arduino programming
Step by Step Guide
Step 1
Create a new project in your Google Developer console. From the top header navigation, select Create a Project.
Step 2
Enter all the required information such as project name, location, billing information, etc. Then, select 'Create.' Wait for some time till the project is created.
Step 3
In the Navigation Menu, go to the Smart Home Dashboard and select Create Project. Fill in the required information such as project name, location, device access, etc.
Step 4
Go to the Actions tab and select the Add Action button. Choose Custom Intent as the action type and enter the required information such as intent name and parameters. Once you are done, click on Save to save the changes.
Step 5
Now, go to Fulfillment and select the Webhook radio button and fill in the URL to which the Google Assistant will send the requests.
Step 6
Next, you need to create a Firebase project. Go to the Firebase Console and create a new project. Then, create a new project and copy the Project ID as we will use this later.
Step 7
Now, open up Arduino IDE and install the Google Assistant Library by going to Sketch > Include Library > Manage Libraries.
Step 8
In the search bar, search for Google Assistant and click on install.
Step 9
Copy and paste the below code in a new sketch.
#include <Adafruit_MQTT.h>
#include <ESP8266WiFi.h>
#include <FirebaseArduino.h>
#include <GoogleHome.h>
#include <GoogleHomeDevice.h>
#include <GoogleHomeMultiDevice.h>
#include <GoogleHomeConnector.h>
#include <GoogleHomeCommunicator.h>
#include <GoogleHomeDeviceExtractor.h>
#include <GoogleAssistantConnector.h>

const char* ssid = "WiFiSSID";
const char* password = "YourWiFiPassword";
#define LED D7
Adafruit_MQTT_Client* mqtt;
GoogleHomeConnector* connector;
GoogleHomeCommunicator* communicator;
GoogleHomeDeviceExtractor* extractor;
GoogleAssistantConnector* assistantConnector;
FirebaseData fbdo;
FirebaseAuth auth;
int relayState = 0;
void setup() {
    WiFi.begin(ssid, password);
    while (WiFi.status() != WL_CONNECTED) {
        delay(500);
        Serial.print(".");
    }
    Serial.println("");
    Serial.println("WiFi connected");
    pinMode(LED, OUTPUT);
    Serial.begin(115200);
    Serial.println("Device ON!!!");
    connector = new GoogleHomeConnector;
    connector->addDevice(new GoogleHomeMultiDevice("guest room"), 1);
    communicator = new GoogleHomeCommunicator(connector);
    extractor = new GoogleHomeDeviceExtractor(communicator);
    assistantConnector = new GoogleAssistantConnector();
    assistantConnector->addDevice(new GoogleHome("the device nickname", "*unique id", extractor,
        [](String action) {
            Serial.println("Getting Action: " + action);
            handleAction(action);
        },
        [](){
            Serial.println("Repeat");
        },
        [](){
            Serial.println("Ended");
        }
    ));
}

void handleAction(String action) {
  if (action == "turnOn") {
        Serial.println("Turning on the device");
        digitalWrite(LED, HIGH);
        relayState = 1;
    } else if (action == "turnOff") {
        Serial.println("Turning off the device");
        digitalWrite(LED, LOW);
        relayState = 0;
    }
    fbdo.setFloat("currentValue", relayState);
}

void loop() {
    if (!assistantConnector->authorized(auth)) {
        assistantConnector->authorize(auth);
        if (!assistantConnector->authorized(auth)) {
            // todo: re-authorize after some time
        }
    }
    if (assistantConnector->hasRequest()) {
        assistantConnector->handleRequests();
    }
    if (!Firebase.begin("your-firebase-project-id.firebaseio.com", fbdo, auth)) {
        Serial.println("Cannot connect to Firebase");
        return;
    }
    if (!Firebase.getFloat("turn-on-off", fbdo)) {
        Serial.println("error");
    }
    if (fbdo.getFloat("turn-on-off") == 1) {
        digitalWrite(LED, HIGH);
        relayState = 1;
    } else if (fbdo.getFloat("turn-on-off") == 0) {
        digitalWrite(LED, LOW);
        relayState = 0;
    }
    fbdo.getInt("interval");
    int cnt = 0;
    while (cnt < fbdo.getInt("interval")*4) {
        if (assistantConnector->hasRequest()) {
            assistantConnector->handleRequests();
        }
        delay(250);
        cnt++;
    }
    Firebase.pushFloat("currentValue", relayState);
}
Step 10
Replace the WiFiSSID and YourWiFiPassword with your WiFi SSID and password. Also, update the device nickname and *unique id with any values of your choice.
Step 11
Next, install the Firebase Arduino libraries by going to Sketch > Include Library > Manage Libraries. Search for Firebase Arduino and click install.
Step 12
Connect the ESP8266 board with your computer using a USB cable. Select the correct board and port from Tools > Board.
Step 13
Upload the sketch to your ESP8266 board.
Step 14
Now ask your Google Assistant to turn on/off the particular device, and it will respond accordingly. You can also view the device's current state, and you can use Firebase to store the current state of your devices and retrieve them whenever needed.
Conclusion
Congratulations, you have successfully implemented Google Assistant on Your ESP8266 board without IFTTT. This will help you control your smart home devices much more quickly without any delays, so there is no need to use third-party services such as IFTTT. This approach gives you more control over your home automation and does not rely on any other service.
Posted on: Jun 3, 2022 Last updated at: May 4, 2023